


Decision trees are used to represent and classify a list of conditions that can occur one after the other in order to obtain a classification of image pixel values.
To open the Decision tree tool, you have to use the remote sensing toolbar by selecting “Raster proces” from the left button and “Decision tree” from the right button.

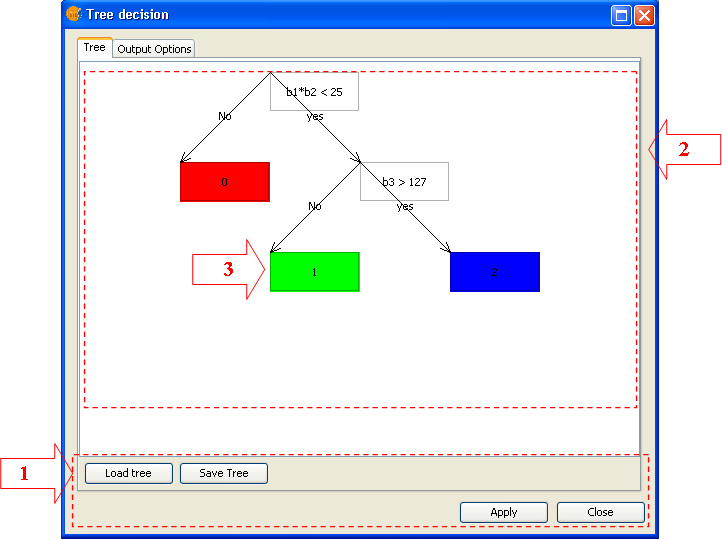
Decision tree tool will appears as follow.
Description of the basic elements
- Menu.
From the Tree panel you can save or load a decision tree. By clicking on Close, you close the entire tool.
- Editing Decision tree panel.
On this panel you draw all the nodes that will affect the final tree configuration.
- Condition Nodes
To set up the tree, it is necessary to add and edit the decision nodes. Decision nodes are the ones appearing in colour in the panel. These nodes are linked to a Boolean expression whose evaluation, for each element of the selected variables, will lead to a result node or to a new evaluation node.
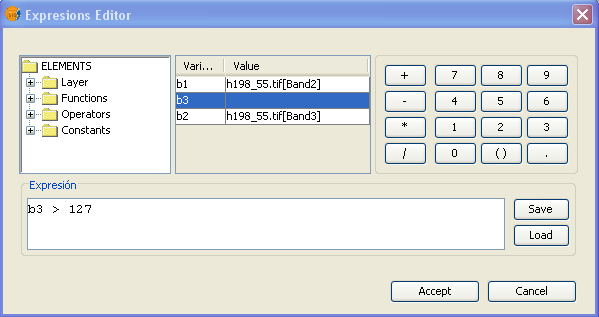
To add a new Condition Node it is necessary to click with the mouse right button (addChild) over a Result Node that you want to split. To assign the evaluation expression to the corresponding node, double click on the node and setup the condition by the expression editor that is shown in the following figure.
- Result Nodes or Leaf Nodes.
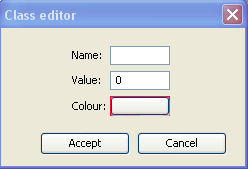
Each Decision Node has to two linked Leaf Nodes corresponding to positive or negative evaluation of the condition. These nodes appear coloured in the panel. They correspond to the assigned colour and value assigned in the result. These values can be modified from the window shown in the following figure and that can be activated by double click over the node.
Execution Options
Once edited the tree corresponding to the desired conditions, you can choose for a full execution or, on the contrary, for a partial execution starting from a given Condition Nodes. To perform the second option, it is necessary to activate the node contextual menu (right mouse button) and select ejecutar.
Output options
In the output options panel you can setup the parameters for the output raster.
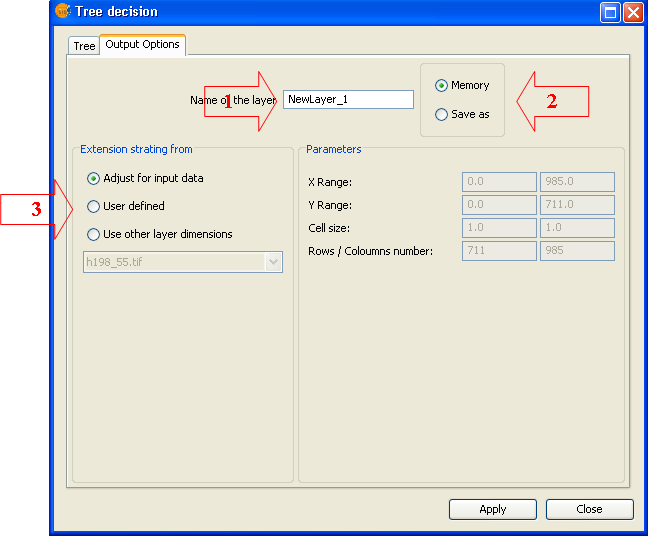
- File name
- Result file path: Select if you want to save the result as a file or to keep in Memory. In the first case you will be asked to specify the destination folder and the file name before launching the calculation. If you choose to keep in memory, you will be able to save it later by the option “Save as” by clicking with the right mouse button over the corresponding layer in the TOC.
- Extension of resulting raster. You can choose result dimension and pixel size as follow:
Adjust from input data: the raster dimension will consider pixel size of all the bands involved in the calculation. Smallest pixel size will be adopted as result.
User defined: Choose this option to input X and Y minimum and maximum values as well as resulting pixel size.
Use other layer dimensions: output raster dimension will assume the parameters of the selected raster layer


